This feature allows you to import 'W' transactions (Worked Time) into the database.
--CAUTION!-- You must have entered your employees first. This will only import hours to existing employees. The worked time also will be posted into Gradience TimeClock if you use that software application in conjunction with Gradience Attendance and have Code Sharing turned on under the TimeClock tab in Global Settings.
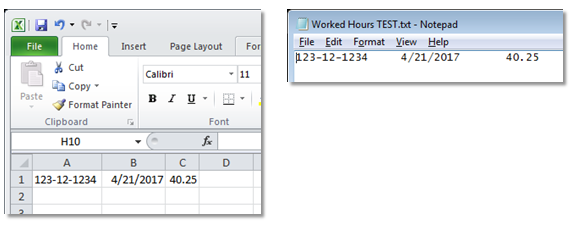
Create an Excel Import File:
- Column A is for the Employee SSN.
- Column B is for the Date of the Import.
- Column C is where you enter the amount of Hours Worked being imported.
1. Right-click on the letter A over the first column and select Column Width and enter 11.
2. Repeat this process for column B, entering 10 for Column Width.
3. Repeat this process for column C, entering 5 for Column Width.
4. Right-click on column C and select Format Cells. A pop-up window will appear.
5. For Category select Number. Set the Decimal Places to 2 and then click OK.
6. Click on File in the upper left and select Save As.
7. In the Save In field at the top-left, browse to wherever you wish to save the file.
8. For Save As Type, click the down arrow, select Text (Tab Delimited) (*.txt) and click Save.
Excel Example: Tab Delimited Example
Import the File into Gradience.
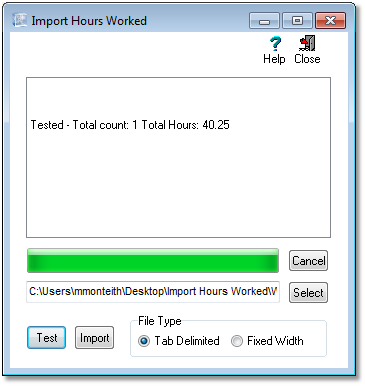
1. In Gradience click File > Import Hours Worked

2. When the popup appears, select Tab Delimited, click Select to browse to and select the file you wish to import, and then click Test to verify there are no errors associated with the file. If successful, it will look like this...
3. Click Import to complete the process. A successful result will appear as shown in the next image.
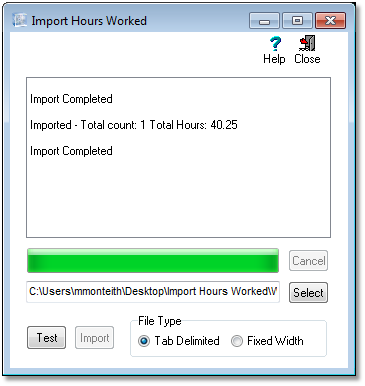
4. Click Close.

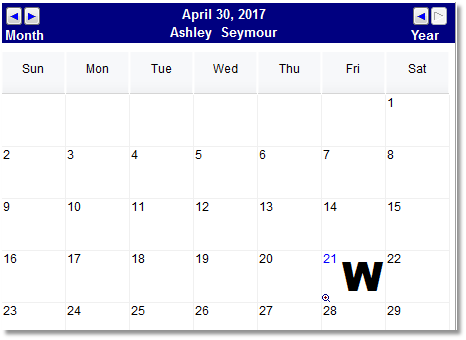
In our original import file we indicated the date of the import was April 21, 2017...
5. Open the calendar screen for the employee affected.
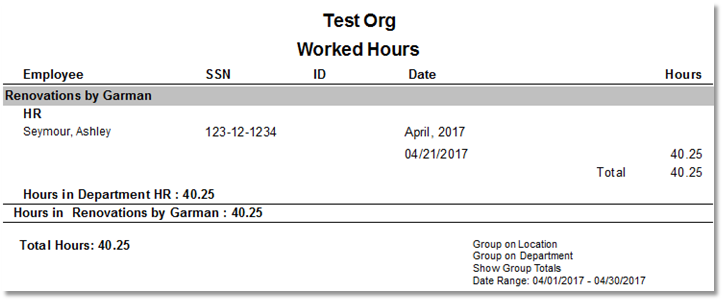
Our report shows the W for the Worked Hours April 21, 2017.
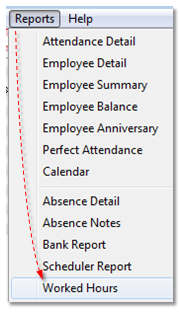
6. Click Reports > Worked Hours.
7. Select the affected employee and set your report filters as desired and then click  . Depending on your report filter selections the resulting report should look similar to this...
Comments
Article is closed for comments.